


Hey NG!
Recently I got to work with the super talented @jessejayjones on a background for his part on the Totally Tubular Collab. Here's how I made it from start to finish, using Photoshop. It's pretty similar to the processes we used at my last job where I worked as a BG artist on a kid's feature film (although for that I mostly only did the line art/flat color/lighting steps.
Here's what Jesse sent me to work off of, as well as the animatic.

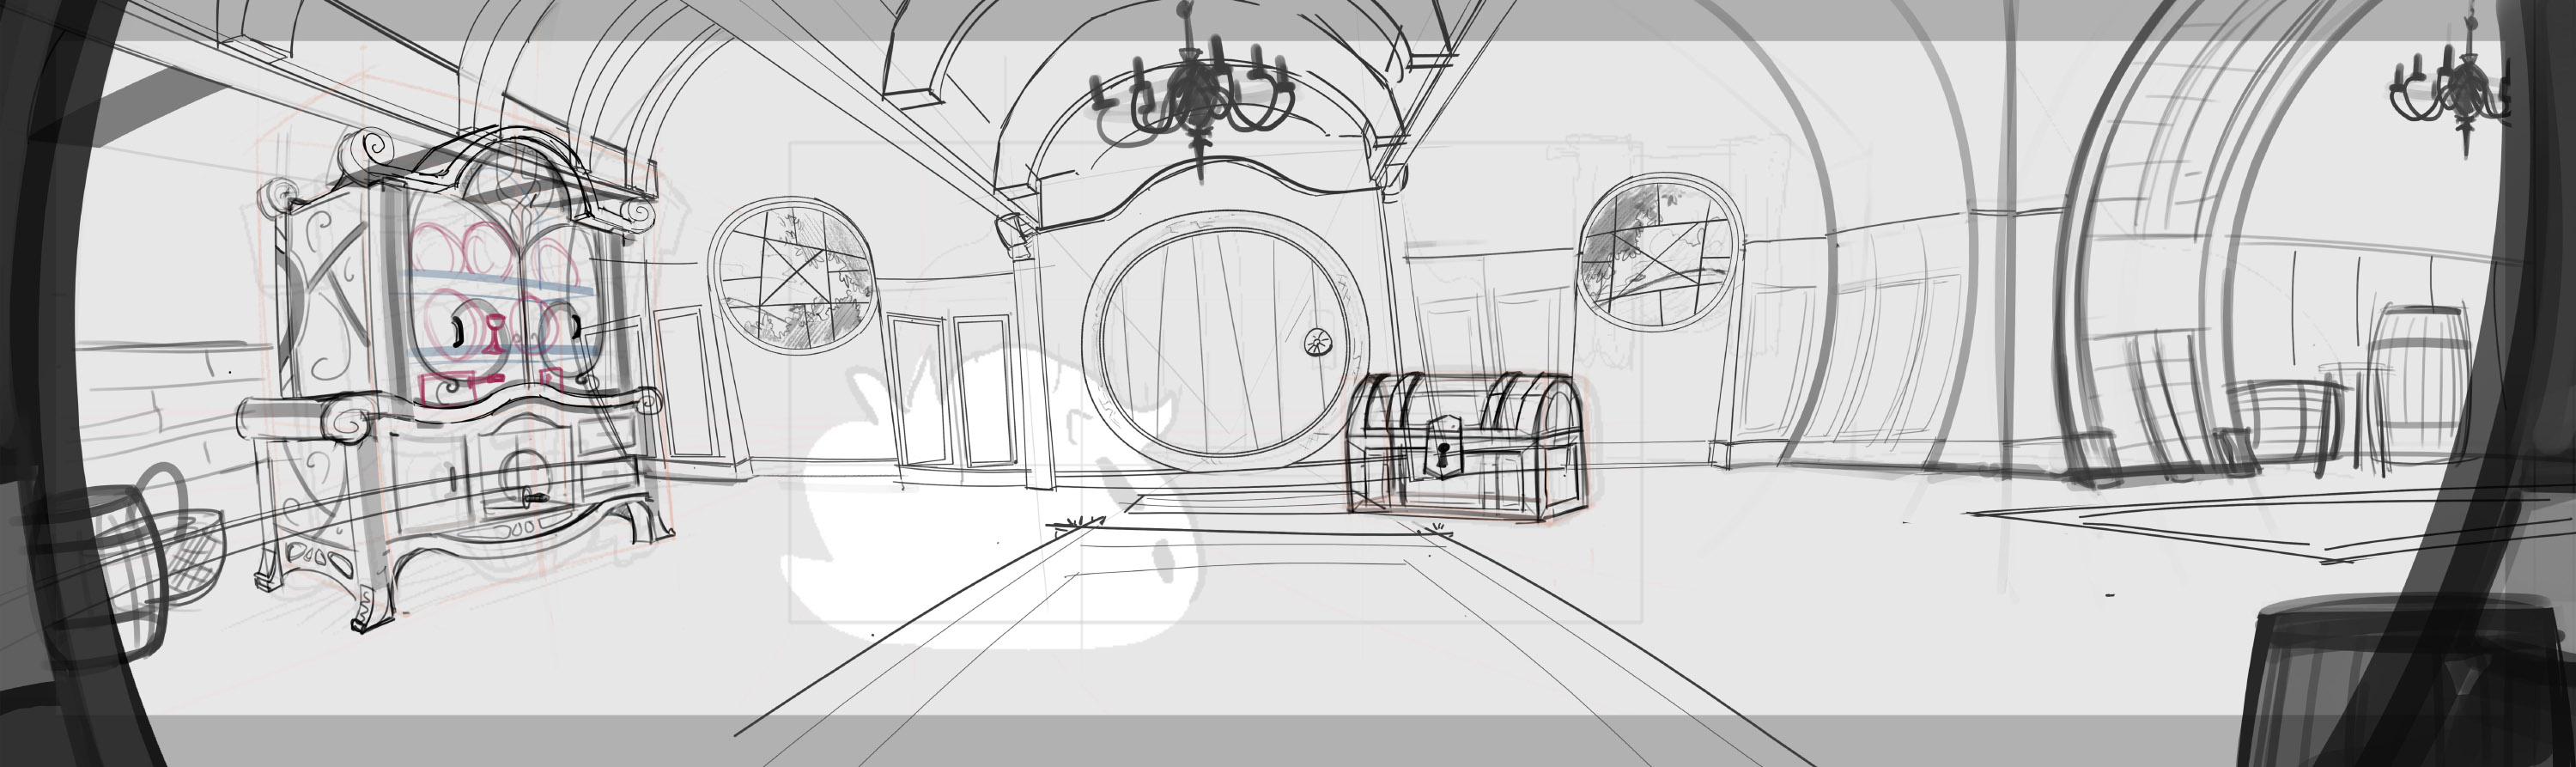
First step is gethering reference images and then drawing up a rough:
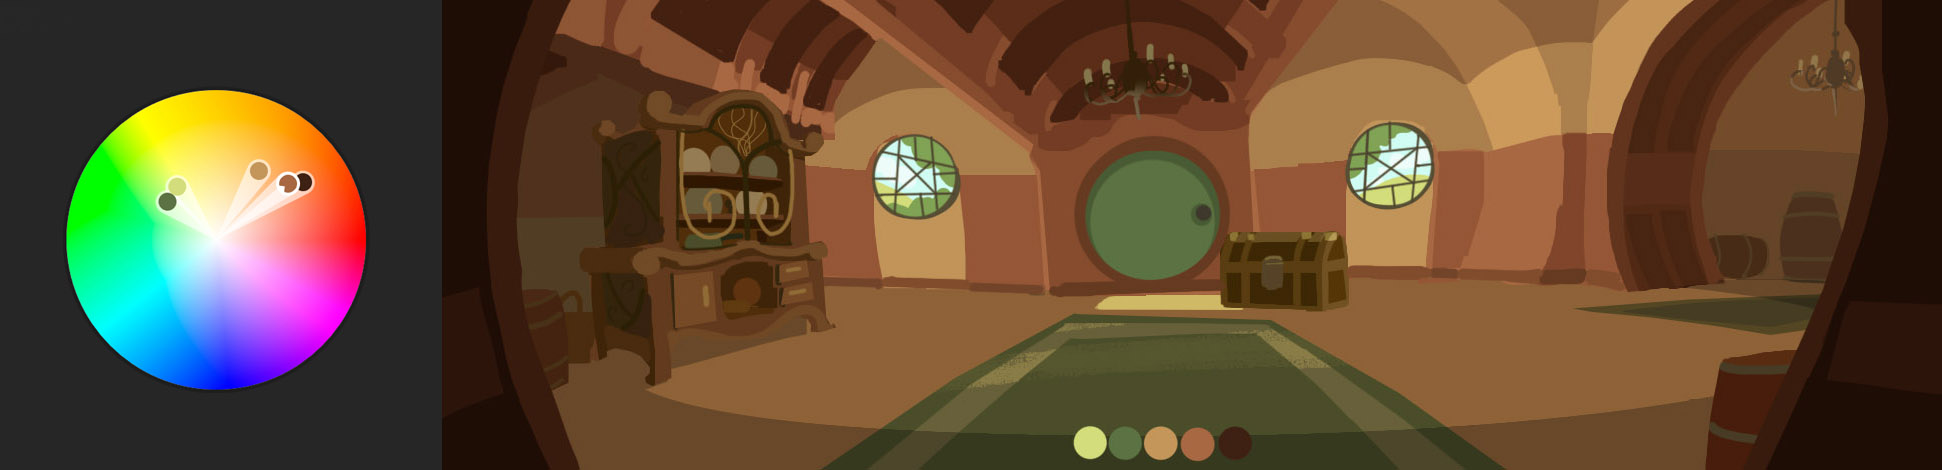
Next I created a color thumbnail. Sometimes when doing color design I play around a bit at color.adobe.com until I come up with something that looks nice. For this background the plan was an analogous color scheme, with nothing being allowed to go further green than the door's color, with the ratio of green to orange favoring a majority orange. Also, oranges/reds were allowed to have a maximum saturation higher than greens. This color thumb involved a lot of playing around with the hue/saturation slider on the individual areas of color until I was happy with it:
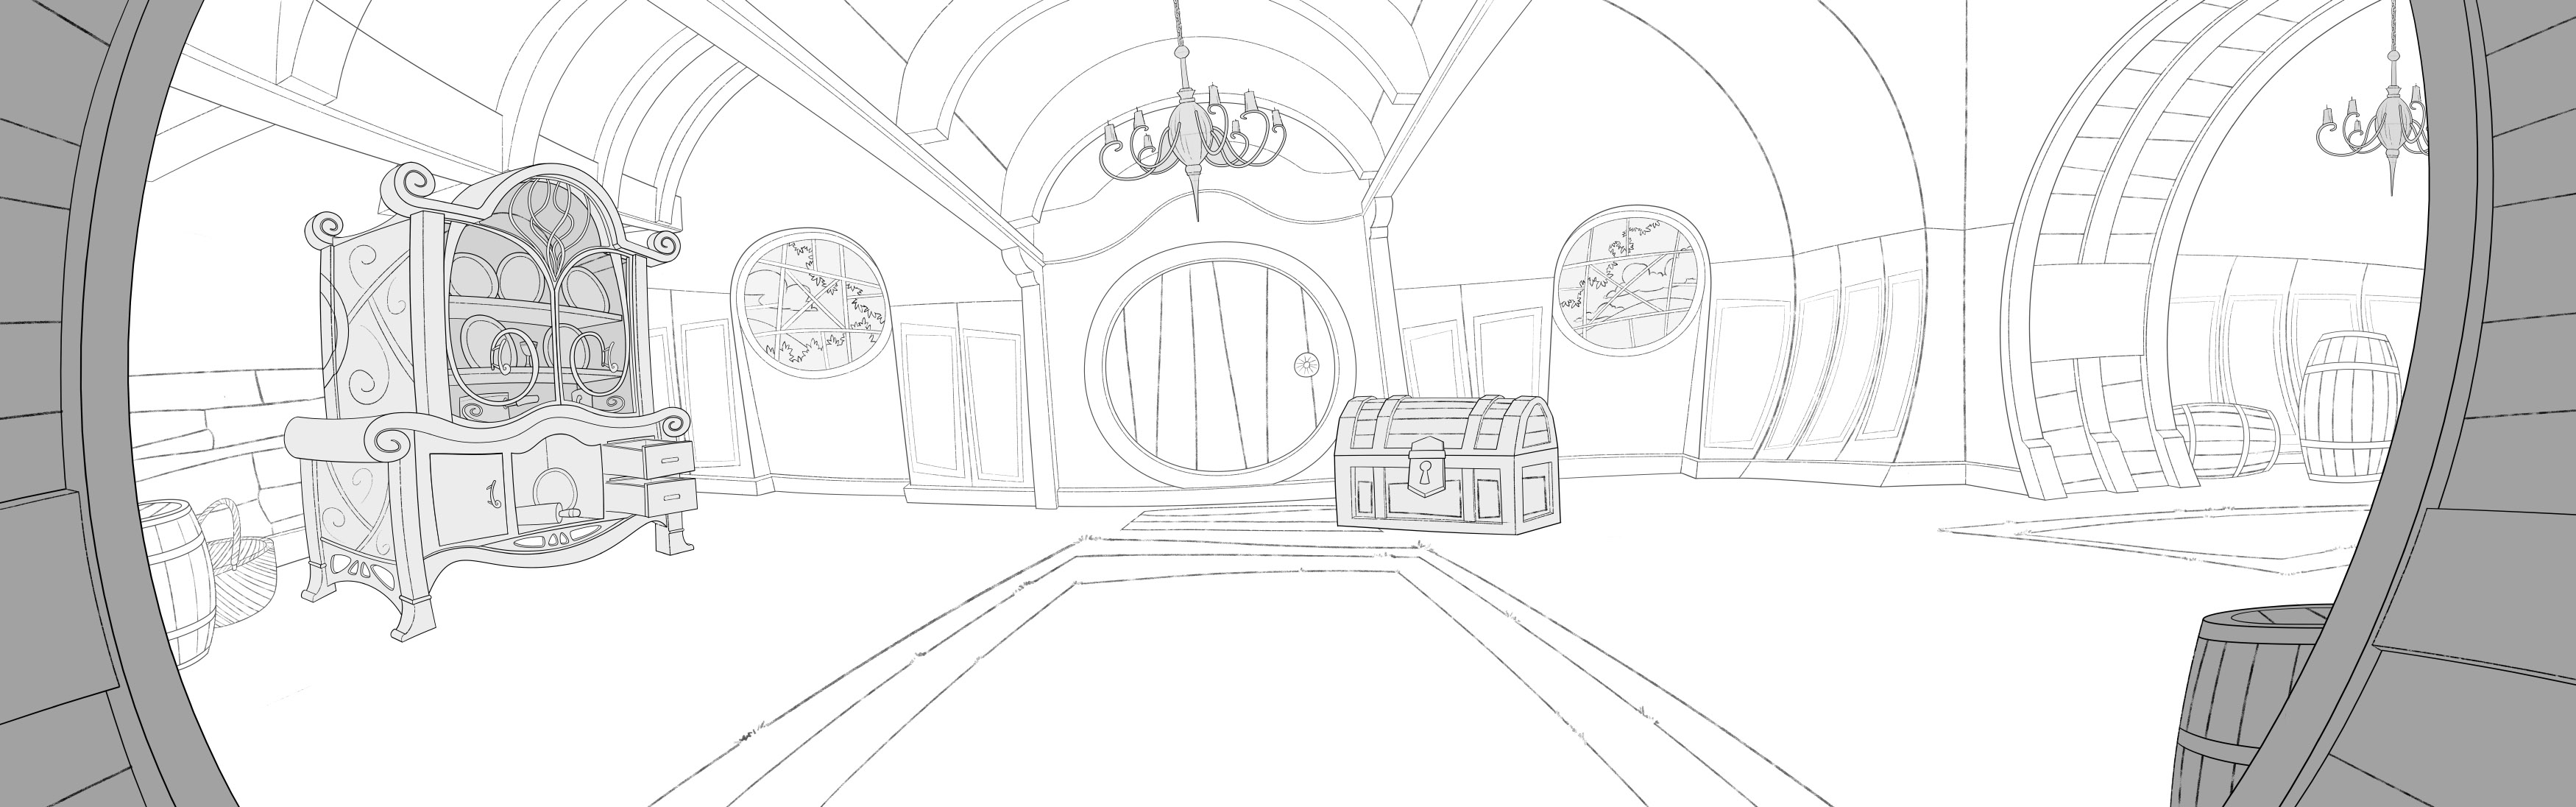
Now I'm ready to work on the final piece, starting with line art. I used three different brushes here, a standard brush (round brush with pressure sensitivity and spacing turned down to 1%), a textured brush for the inside lines of elements like wood, and a thicker textured brush for other elements like the rug and stones on the wall:
Next is coloring. I painted in flat fills underneath my lines, using my color thumb as a guide. Some fills bled out past the lines as a deliberate style choice (was one of the things I wasn't sure if it was going to end up looking good or not though). Then I recolored the lines to be slightly darker and more saturated than the colour of the fills.
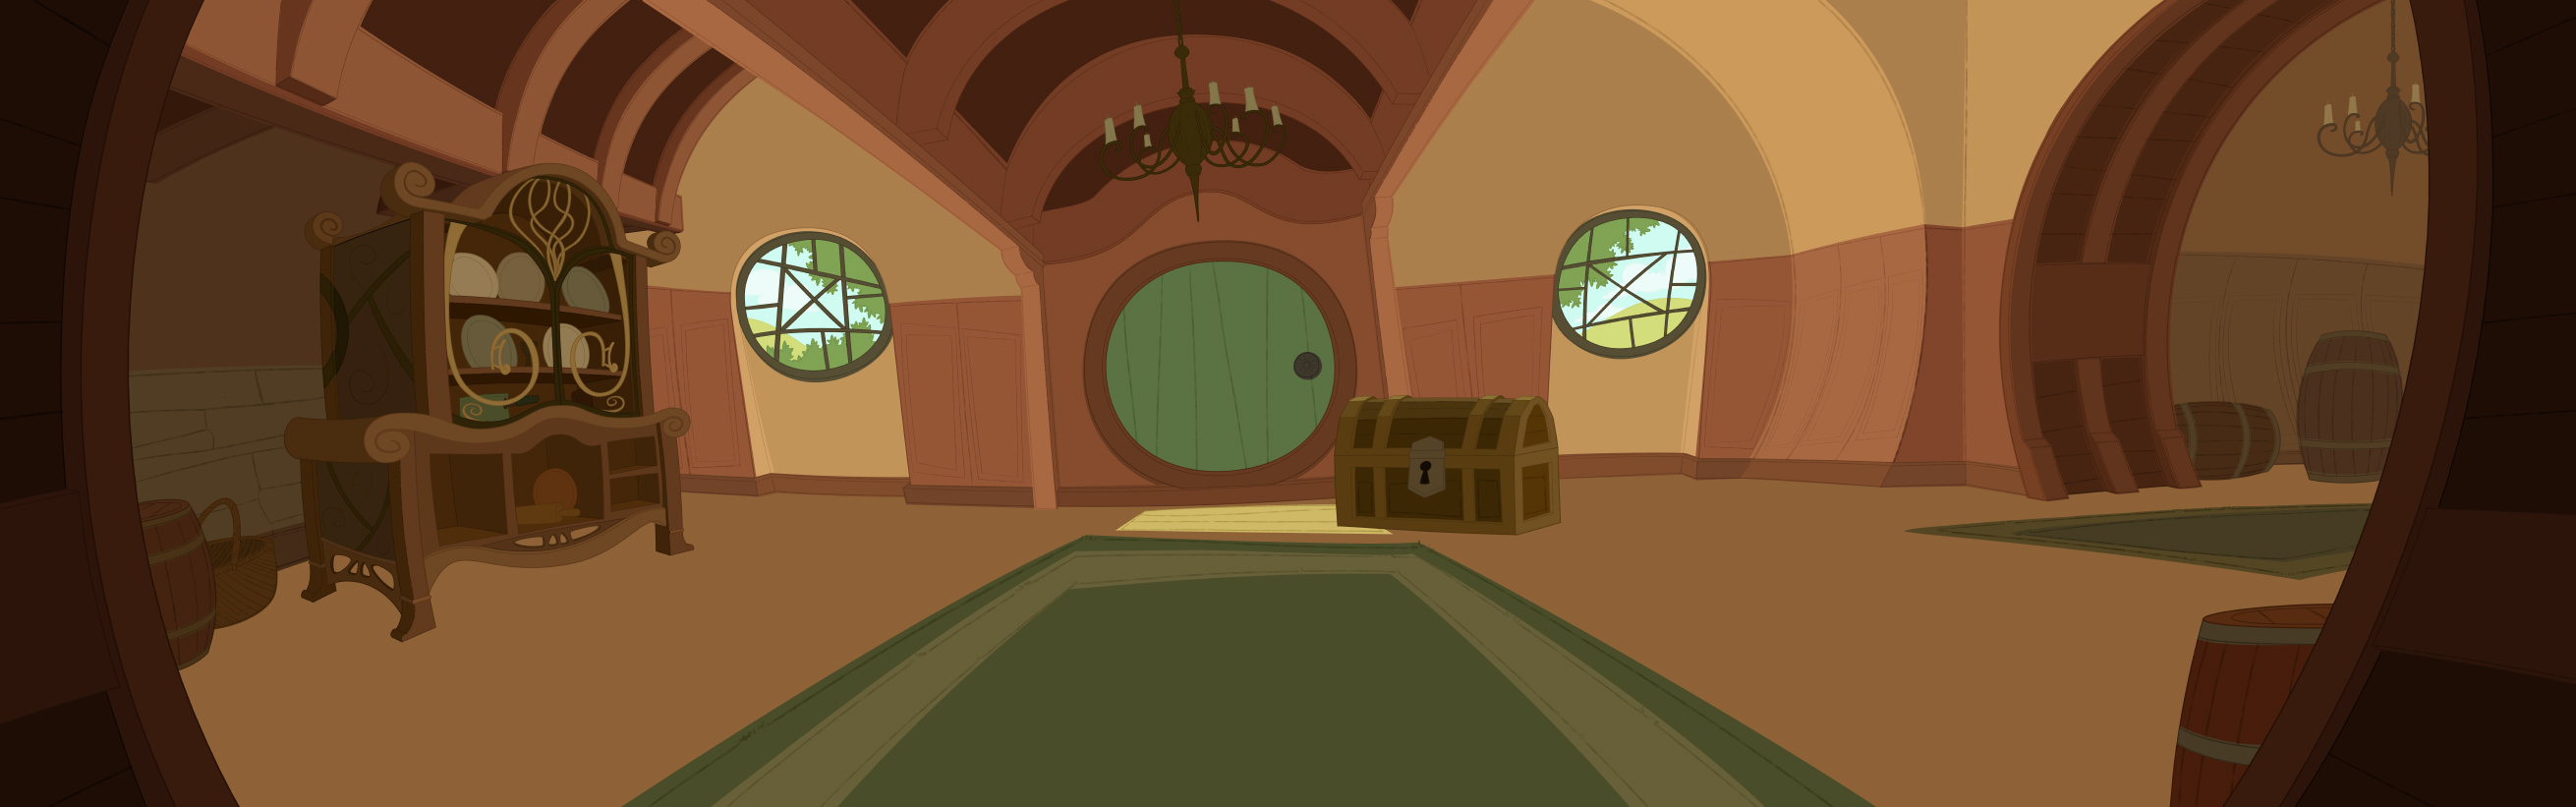
Lastly is lighting. Hard shadows are painted in using the multiply blend mode, and hard highlights/soft lighting were done with color dodge/screen (really whatever looks good). Finally I added subtle amounts of texture to some things and a reflection from the windows.
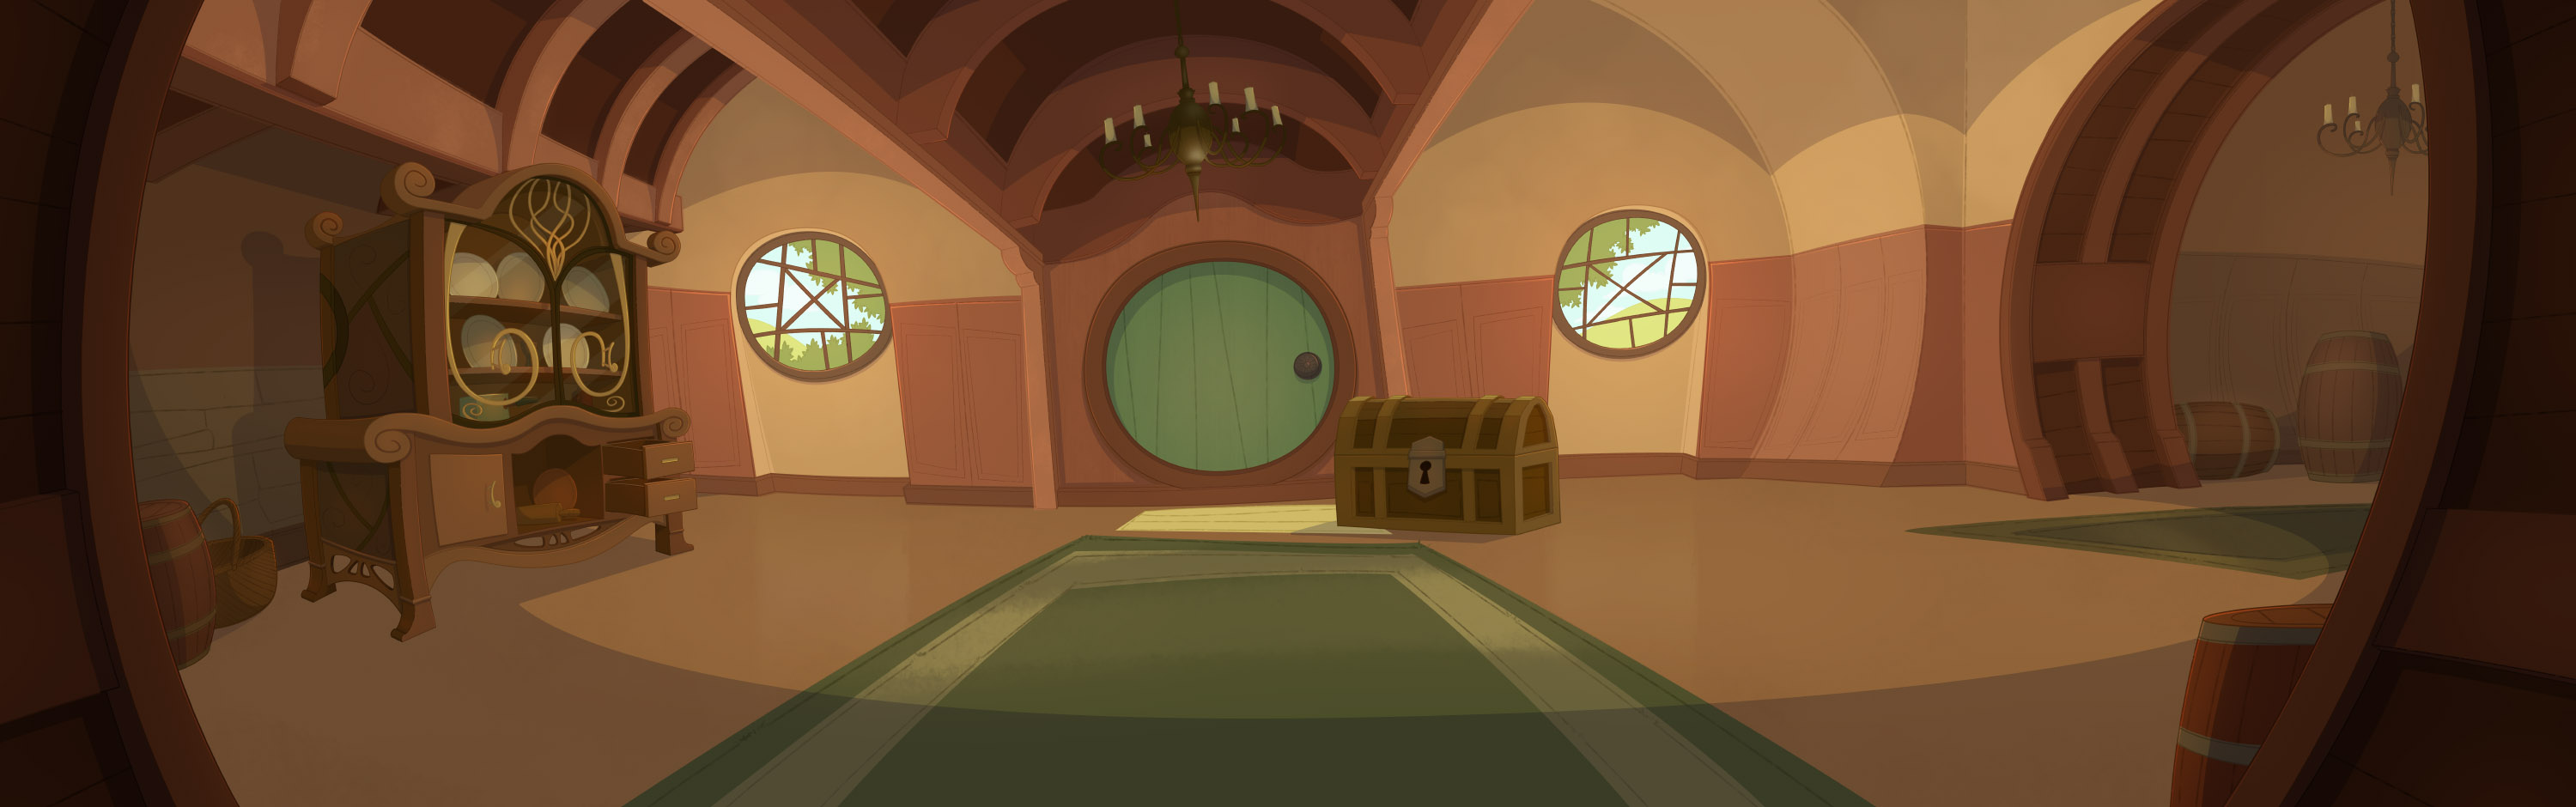
Make sure to take a look at the end result and Jesse's finished animation!
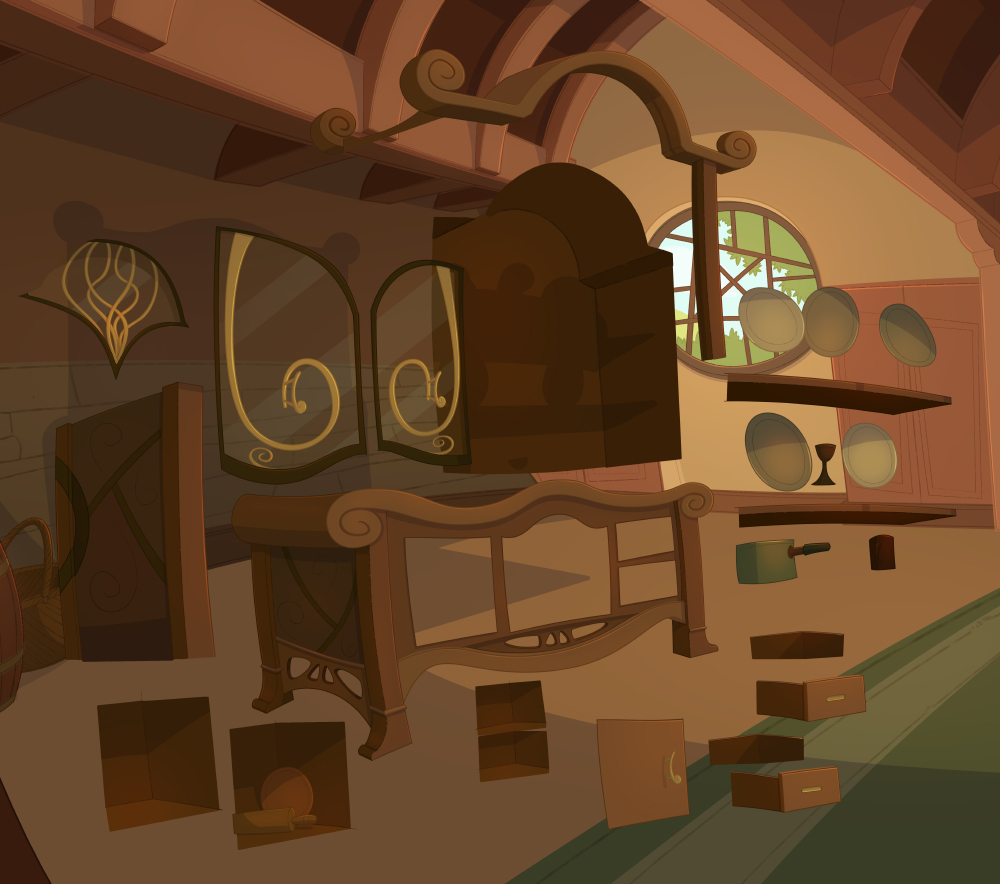
Bonus: All the elements of the cupboard prop seperated out:
jessejayjones
This is incredible man, I think this is your best work yet! I'm grateful I got to work with you again on this, it's great to see your process and the steps you go through when designing these. Amazing work!! ♥